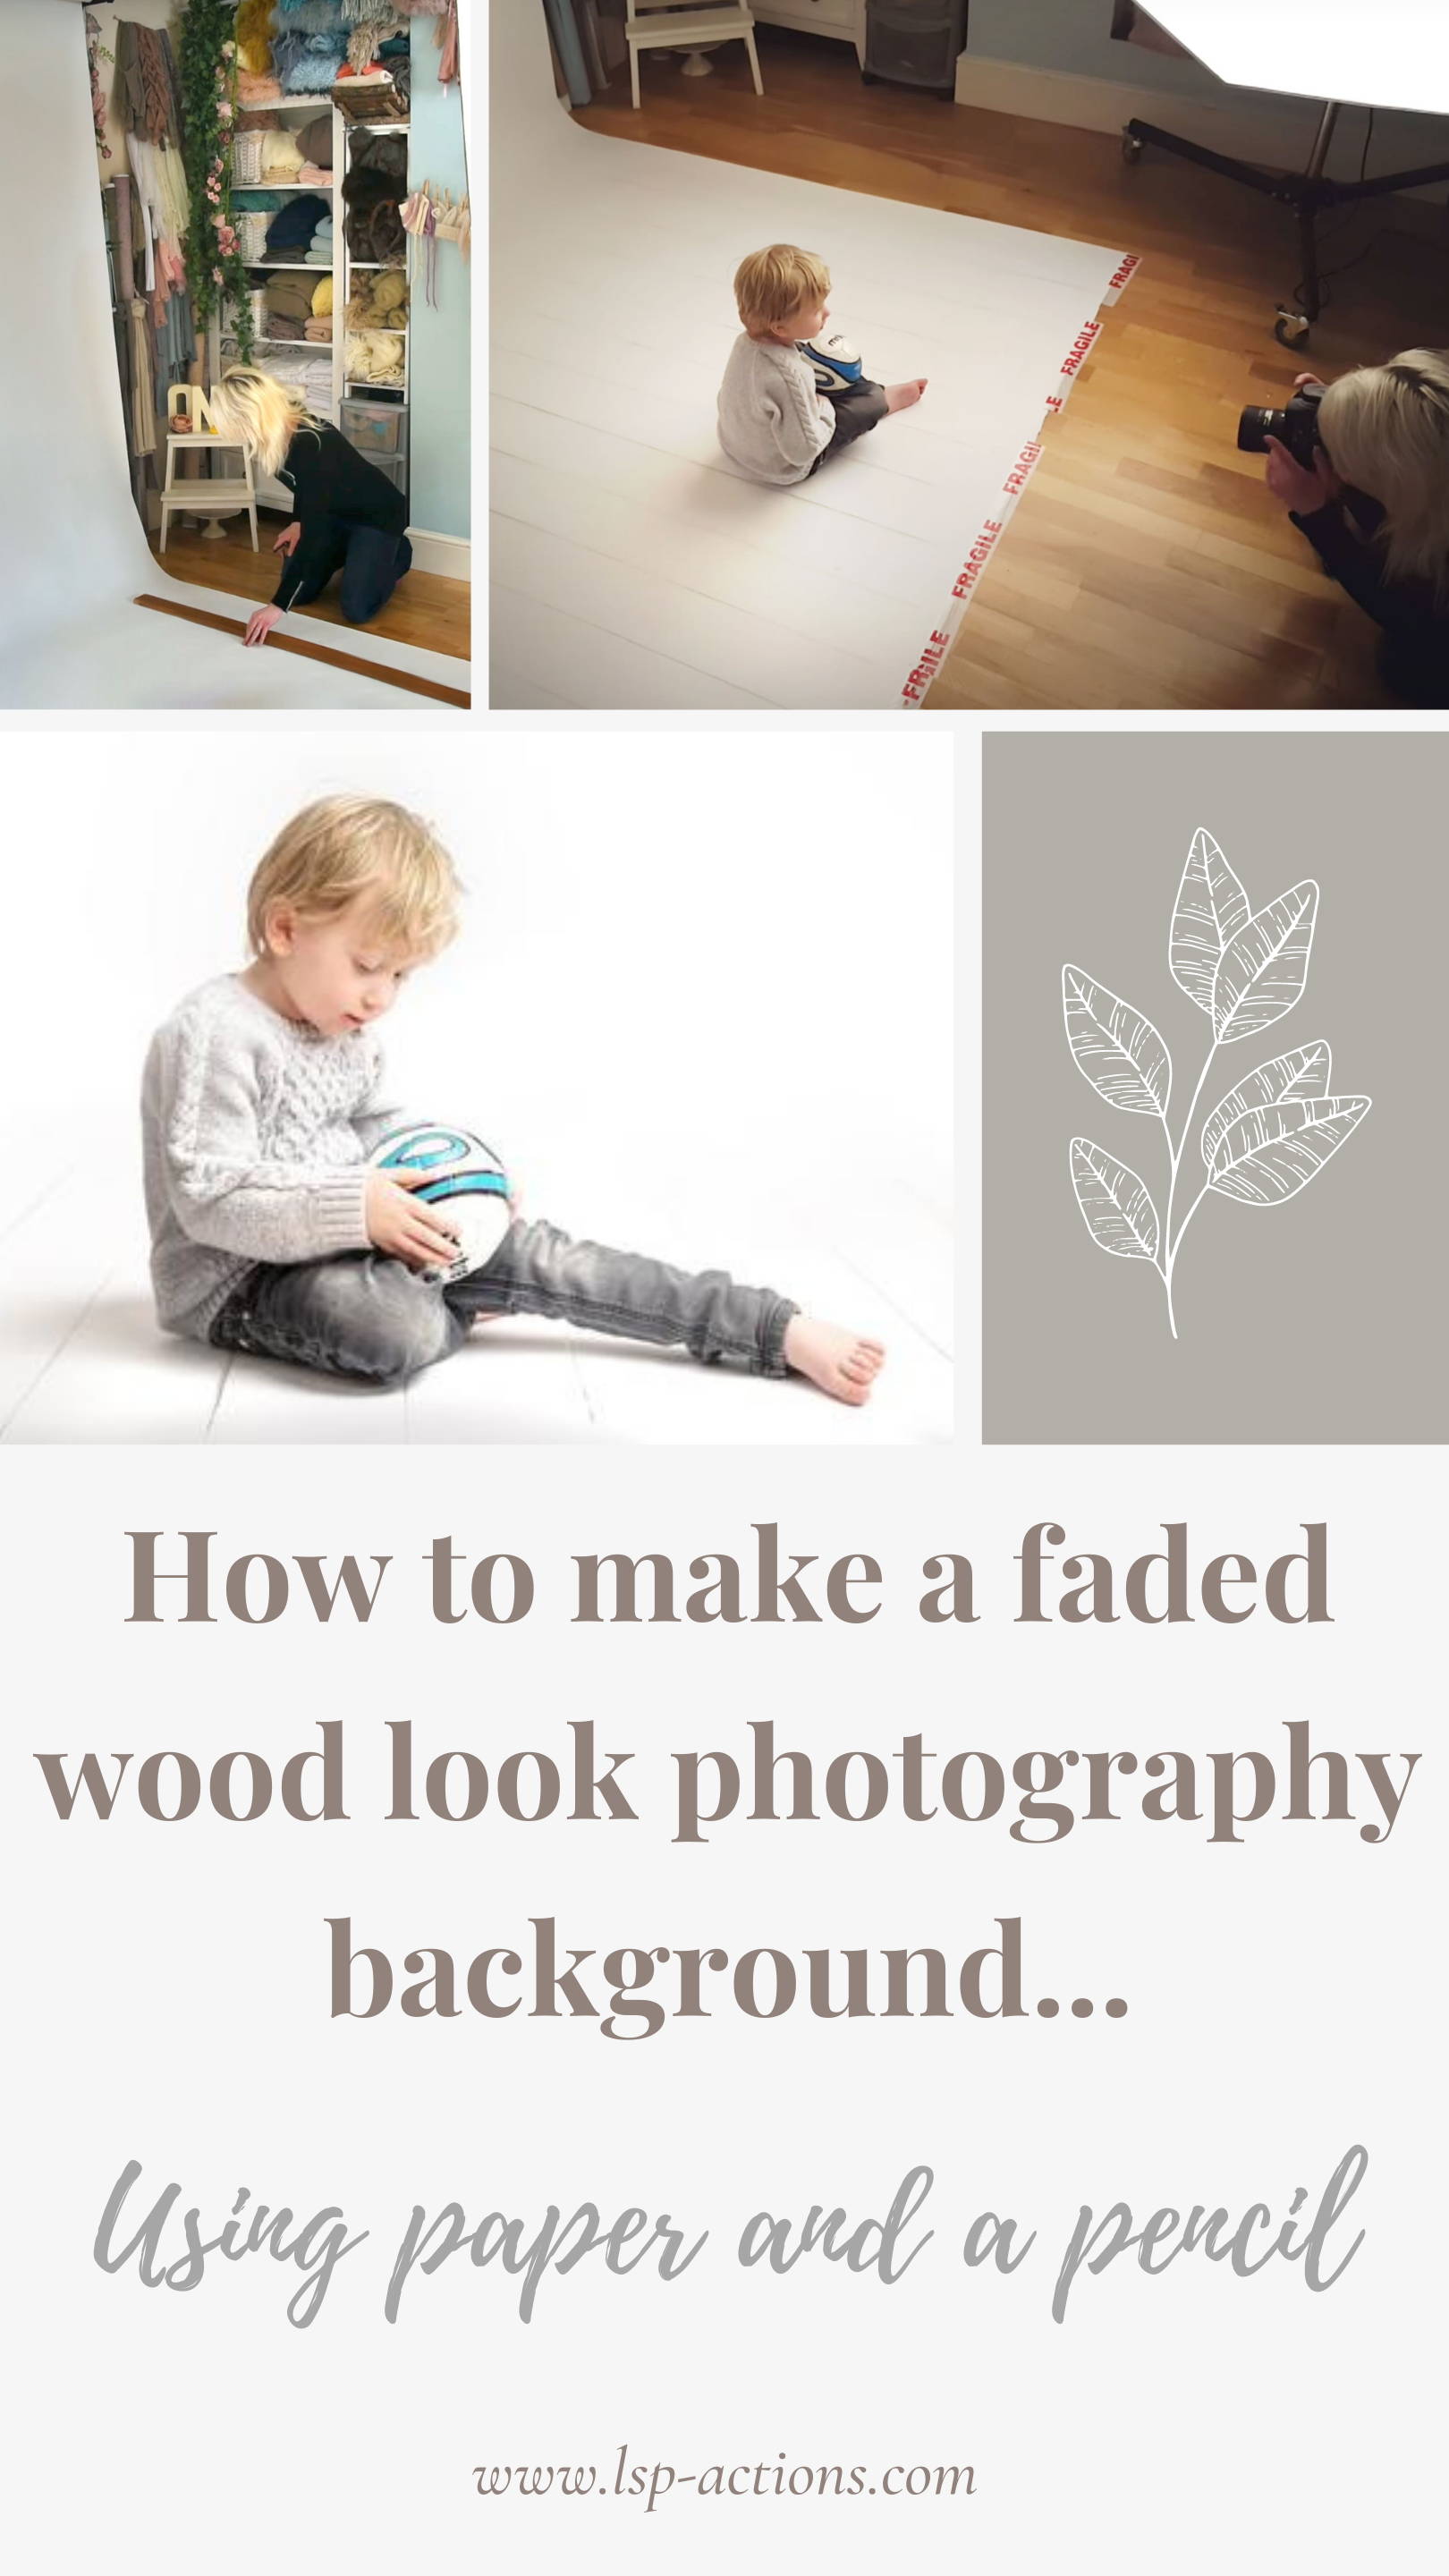
How to create a wood-look faded photography background using paper and a pencil in minutes.
If you want a pale, faded wood look photography background for use in your photography studio, you can create your own in minutes. The best part is that you can do this with things you already have so you don't have to buy anything new.
What you need:
• Seamless paper backdrop roll
• Pencil
• Something you can use as a straight edge
• Gray crayon for shading depth (optional)
This faded wood-look photography background is ideal for cake smash sessions, newborn shoots, milestone photography, maternity, boudoir and all studio photography sessions.
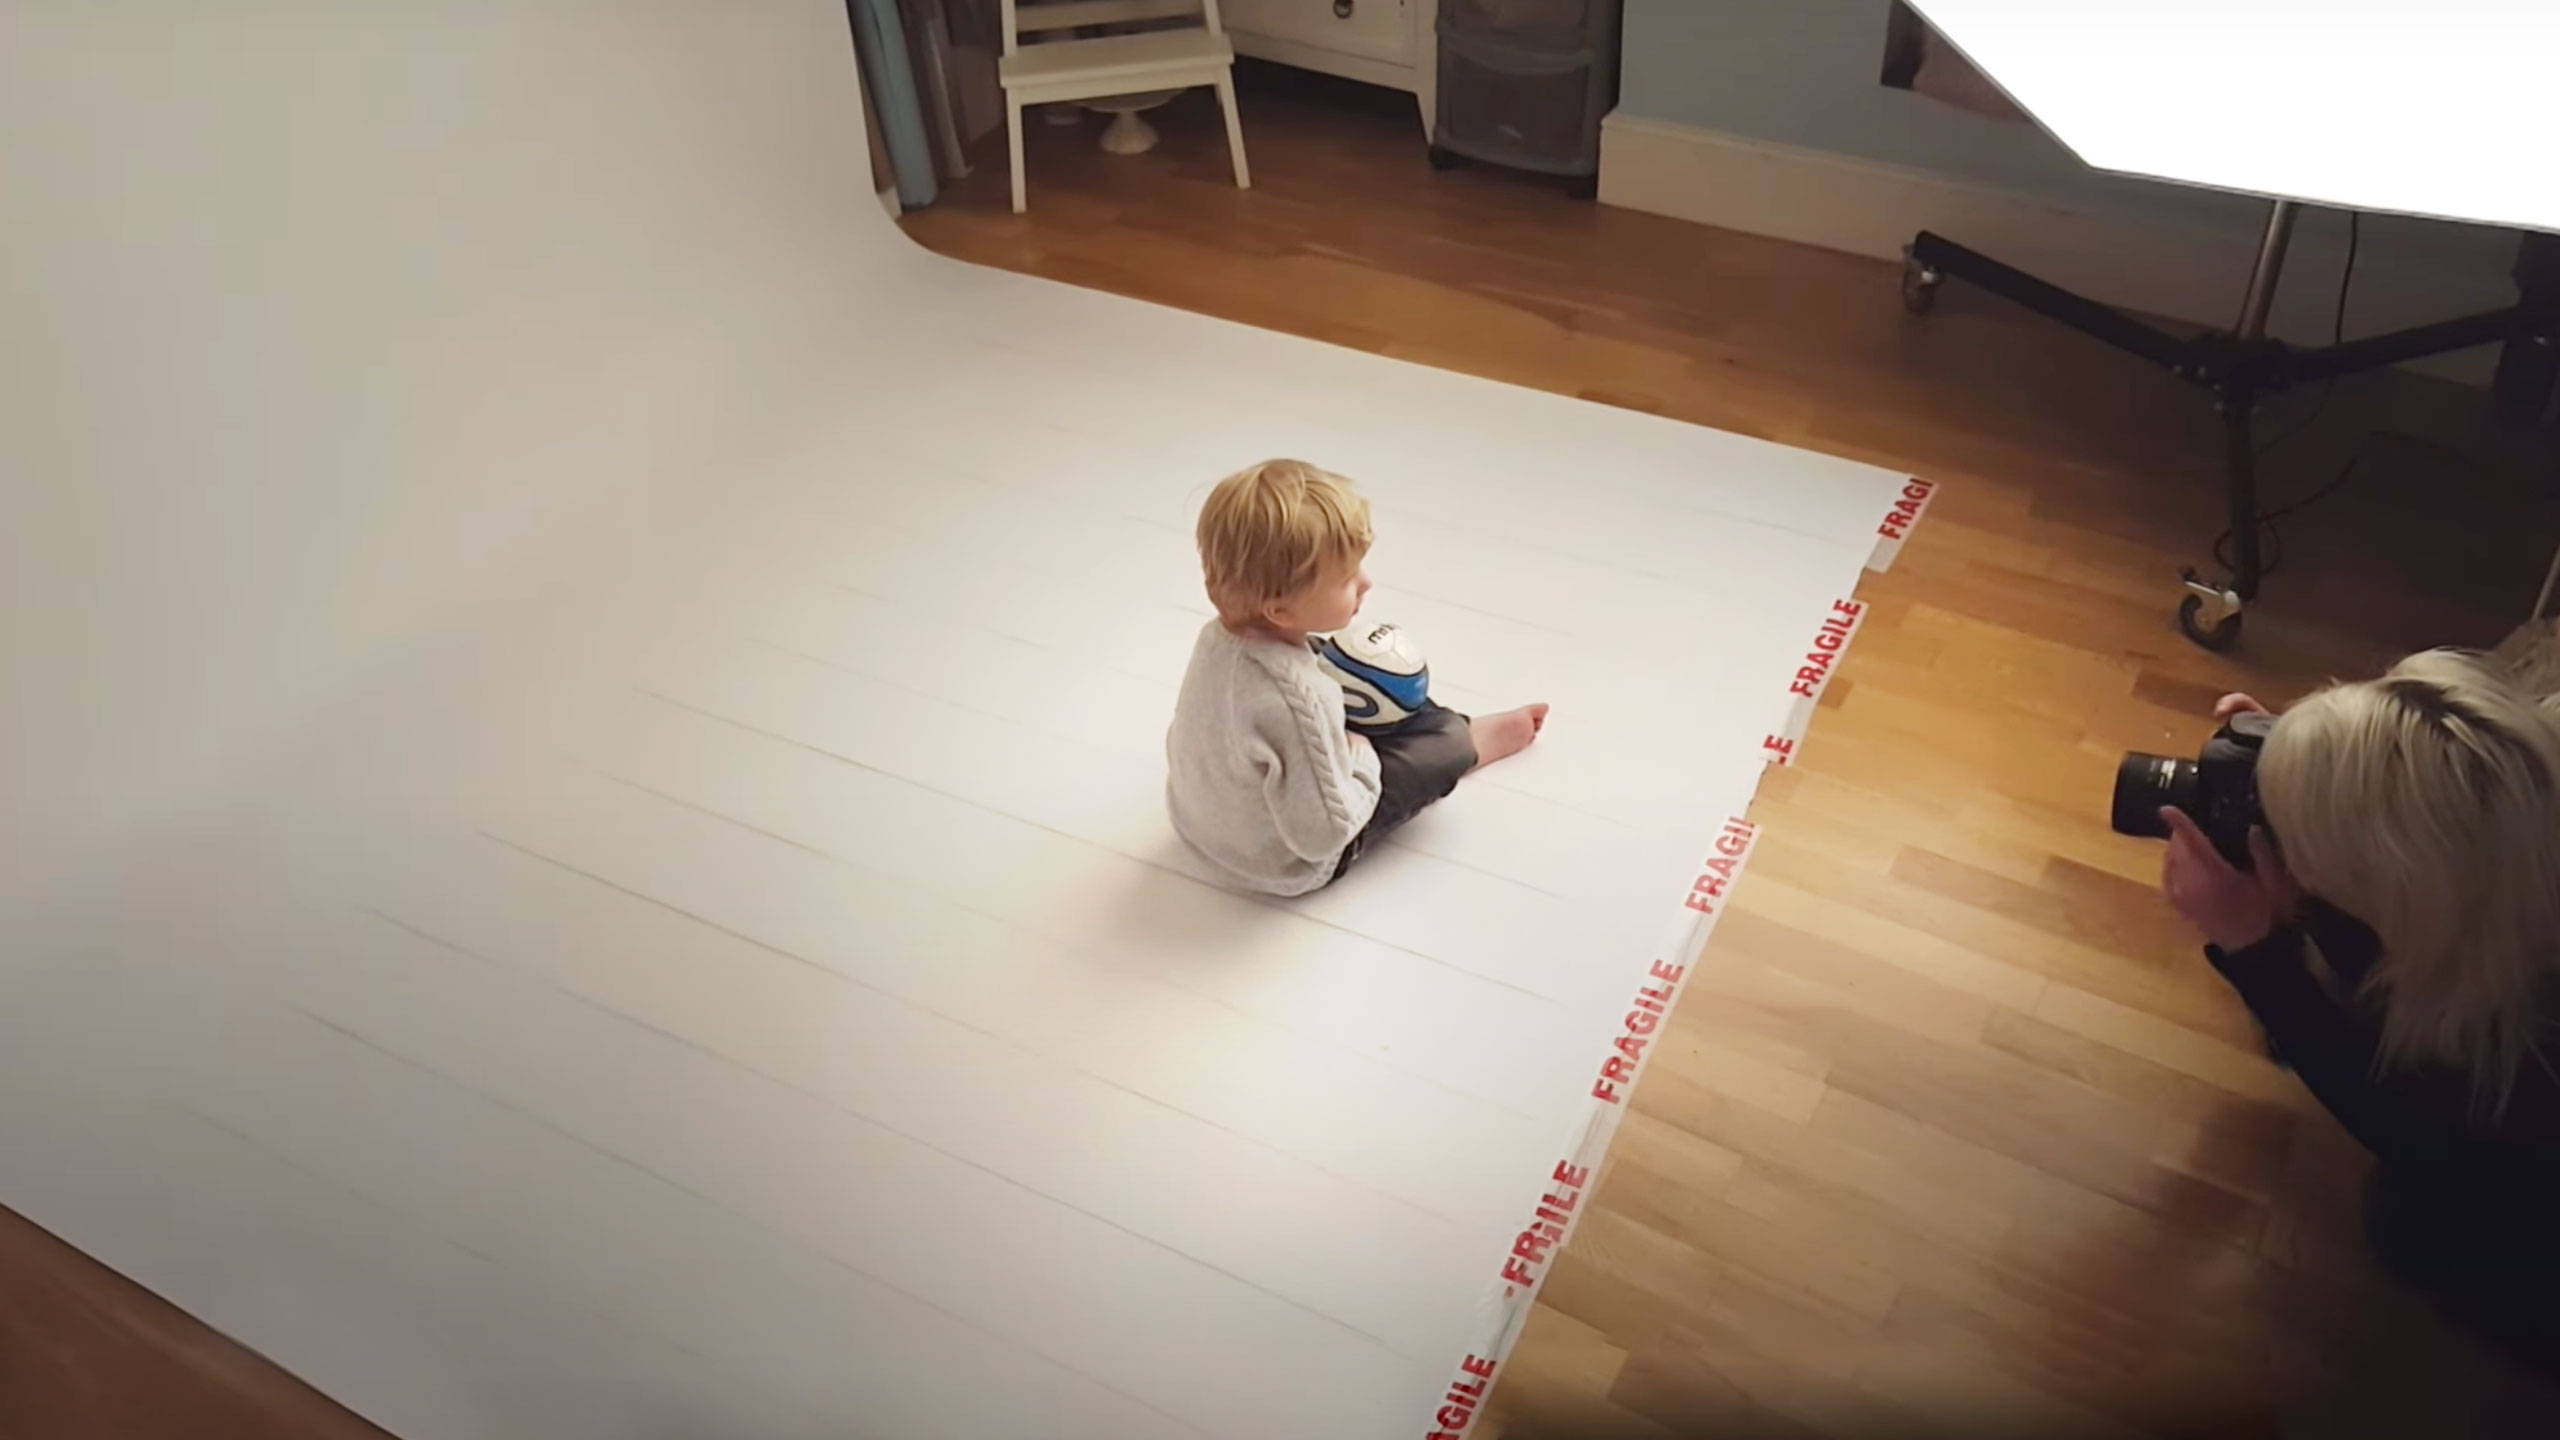
This easy technique works whether you have your paper rolls mounted to the wall on a backdrop system, or you just use a simple backdrop stand. In studio or mobile on location, it looks incredibly realistic.
Watch the 4 minute video below or scroll down for the step-by-step instructions to learn how to make your own.
Join the LSP Actions Photography tribe
Sign up for weekly photography tips, editing tricks and latest news from Photographer and editing tutor Lauren Bennett
Disclaimer — I know I know, this video is rather off-the-cuff. It was Mother's Day here in the UK and I'd had a wonderful day filled with cold cups of tea, scribbled drawings and sticky kisses. I managed to find 20 minutes peace in the evening by hiding in the studio because I had "work to do"... creating this fast and effective video tutorial. Ha! Find out more about me, Lauren at LSP Actions here.
How to create the wood-look photography background step-by-step guide:

Step-By-Step Instructions:
1. Roll out your background paper to the depth you will need for shooting.
2. Tidy up the edge with scissors if needed.
3. Use a tape measure/ruler to plan out the distance between your planks (6" - 7" works well).
4. Draw light marks to use as guides.
#tip — keep a pencil sharpener handy.
5. Use the pencil to draw the straight lines from front to back to mimic wood planks.
#tip — start soft, you don't want harsh lines
6. Take your time, have regular breaks to stand back and assess how it's looking.
7. Use a light crayon to draw a second line, on the opposite side to your light, and smudge with your finger top to create depth and realistic shading. (Optional)
That's it! This photographs beautifully and looks very effective.
Variations:
• Don't want a fade? Draw to the back and add a skirting board for a wooden floor and wall look... you could even draw one.
• Use for a cake smash photography session, then just chop and chuck the mess.
• Experiment with different tones and styles.
• You could even draw wood grain, flaws and knots.
• Try with a dark background, let your creativity take you to the next level.
Editing crisp dreamy whites in Photoshop or Lightroom:
The before and after images below were edited using the LSP Actions White Linen Photoshop Actions and Presets. If you want to achieve those soft, dreamy whites you can download the White Linen Actions here: LSP White Linen Photoshop Action collection


So there you have it!
Can't wait to see what you do with this. You can share your results in the LSP Actions facebook group for photographers here.
Enjoy!
Lauren Bennett
Photographer & Editing tutor at www.lsp-actions.com
PS — Do you have any amazing DIY photography tips to share? Or did you try this yourself? Let me know in the comments below.

By Lauren Bennett
Photographer and editing tutor at www.lsp-actions.com
Want to save this handy blog post for later? Click below to pin or share.